Authority
This Medium machine took me a several days if not a week to complete. I hope you will enjoy this write-up as much as I enjoyed rooting this machine :)
Enumeration
As always, a good nmap scan is great:
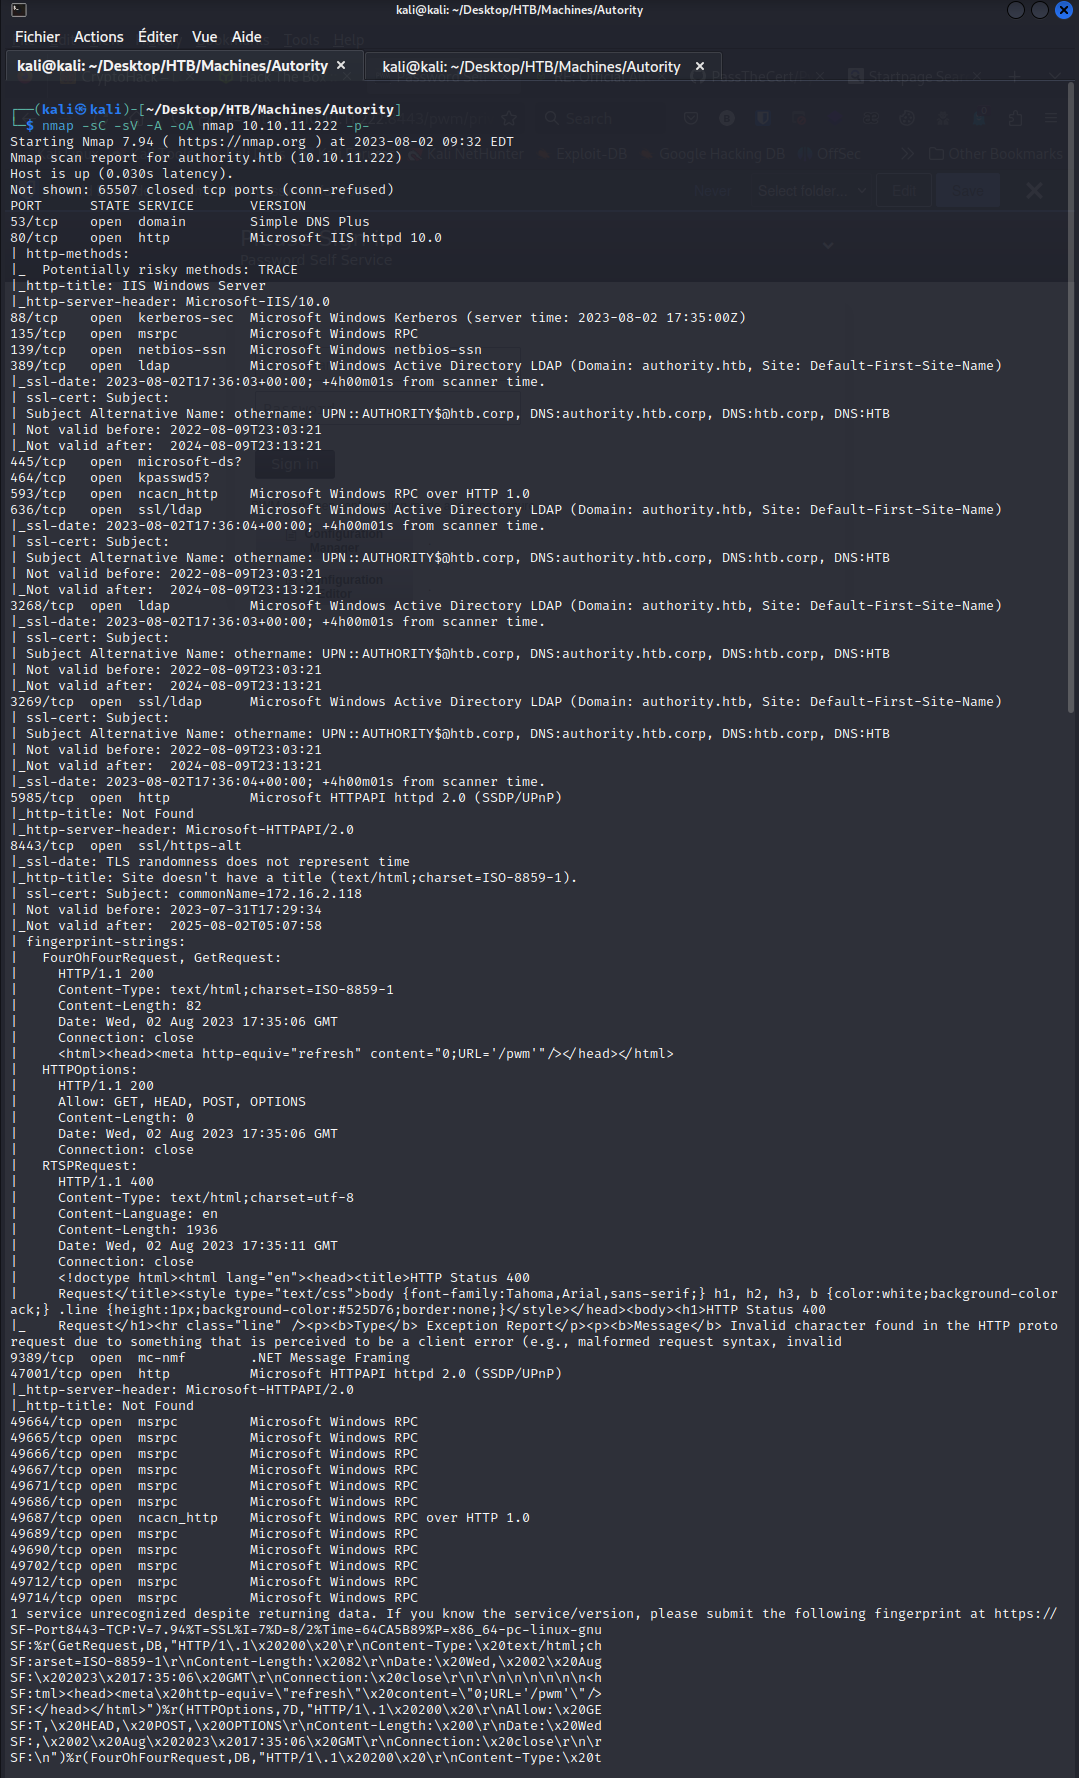
As we can see, we have a lot of open ports. We can notice that port 80 and 8443 are web interfaces. After running a gobuster scan and reading the source code of port 80 I didn’t found anything so I looked at the port 8443. We are automatically redirected to the /pwm page and we are asked to provide credentials.
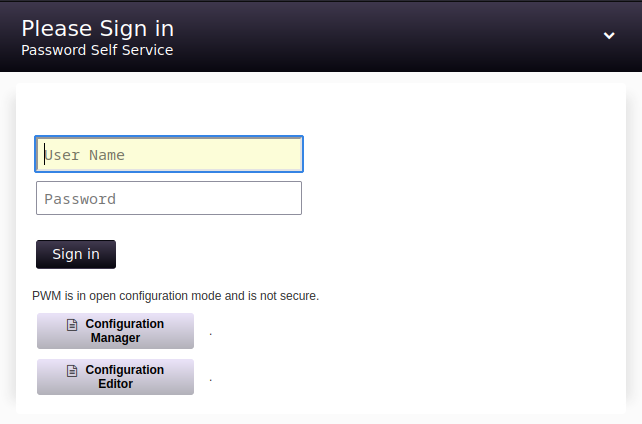
I tried the default admin:admin credentials and got the following error:
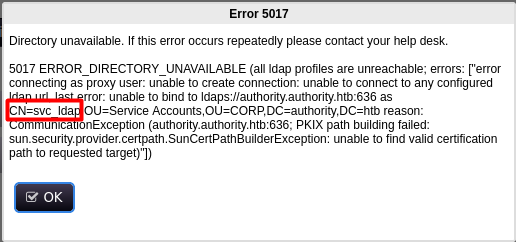
So now we know that there is a user called svc_ldap.
If we go to the Configuration Manager or the Configuration Editor, we are asked for a password only. After a bit of digging, I didn’t find much on this interface neither.
SMB Information Gathering
I decided to look at the SMB shares:

As we can see, there is a Development share that we can access. I used smbget to recover the whole shared folder:
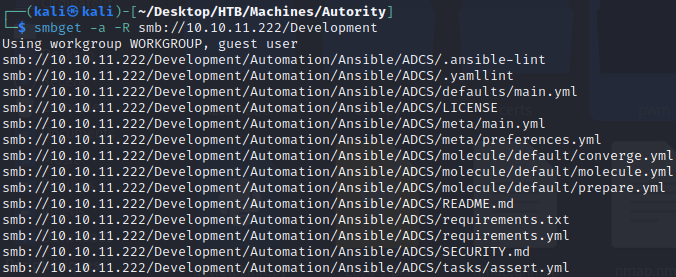
As we can see, there is a folder called Ansible. Ansible is an open-source automation tool used for configuration management, application deployment, and task automation in IT environments, enabling easy and efficient management of infrastructure and software through declarative code.
I first search for usernames:

With this command, I found several users and now I tried to find password the same way:

This command gave me five passwords, but none of them allowed me to connect to the web interface on port 8443. In the file Automation/Ansible/PWM/defaults/main.yml, we can notice some weird credentials:
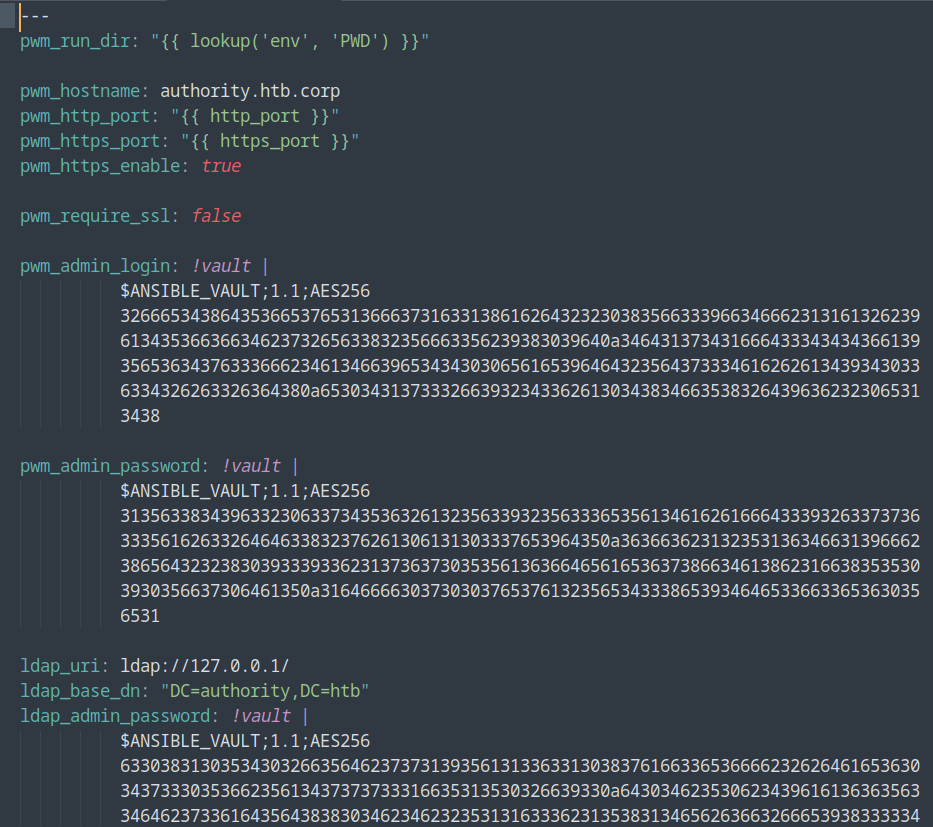
They don’t look like passwords nor hash. After a bit of digging, I found this blog that tells us how we can crack those secrets. So I copy every Ansible Vault blob (the $ANSIBLE_VAULT;1.1;AES256... part) and saved it in one file per each blob. I then used ansible2john to convert the blob into a hash that John can crack:

We found the password !@#$%^&*. I tried to connect with it, but it didn’t work… obviously. This is the password for Ansible not the web interface. I found this article that explains how to recover the Ansible Vault clear text with the password:
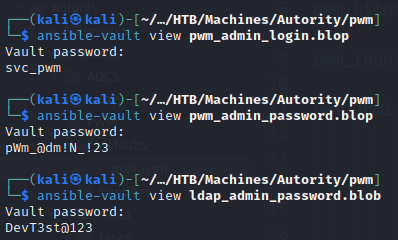
Note that every blop has the same password. Even if all 3 hash are different, they gave us the same
!@#$%^&*password.
PWM Interface
The user password interface didn’t seem to work, so I tried to connect to the Configuration Manager. I manage to connect with the password pWm_@dm!N_!23 and I get this page:
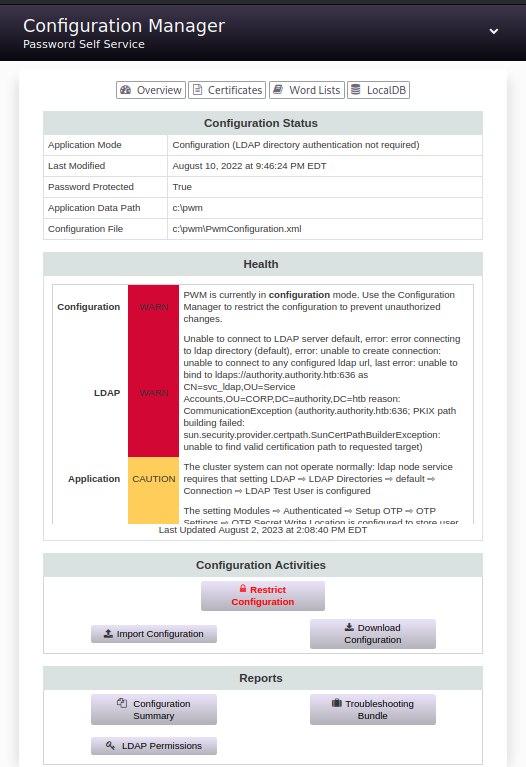
After downloading every file I could, I noticed that in the configuration file PWMConfiguration.xml (that we can download via the Download Configuration button) there is in the comment this:

In the same file we have the user svc_ldap that we found earlier but with some strange looking encrypted password:

I added the <property type="storePlaintextValues">true</property> property in the properties section and uploaded it via the web interface. Then, the web service restarts, and we can connect back with the same password and download again this file:

User.txt
Now that we have the credentials for svc_ldap, we can connect to the machine and get the user flag:

Privilege Escalation
After a bit of digging on the machine and not finding anything, I decided to run winpeas. This tool is an equivalent to LinPEAS for Linux. I found that I can authenticate to the machine with certificates:
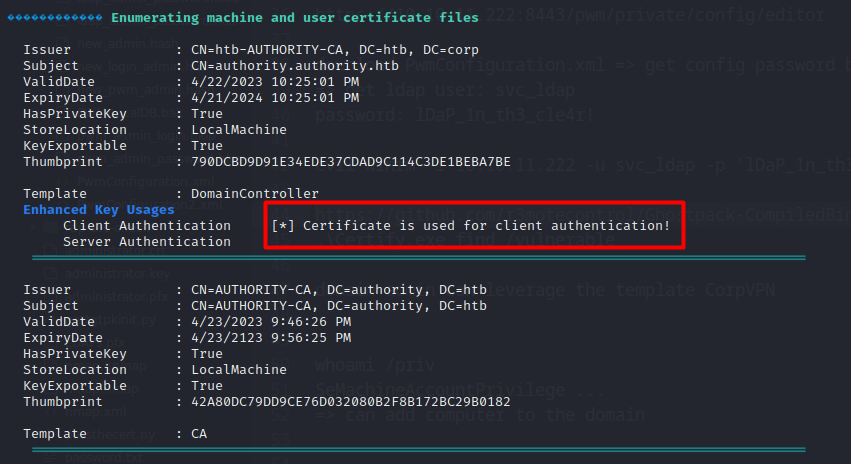
After some research, I found that the tool Certify can help us.
The main blog about certificate attacks that I found where HackTricks, Specteros and Exploit Notes
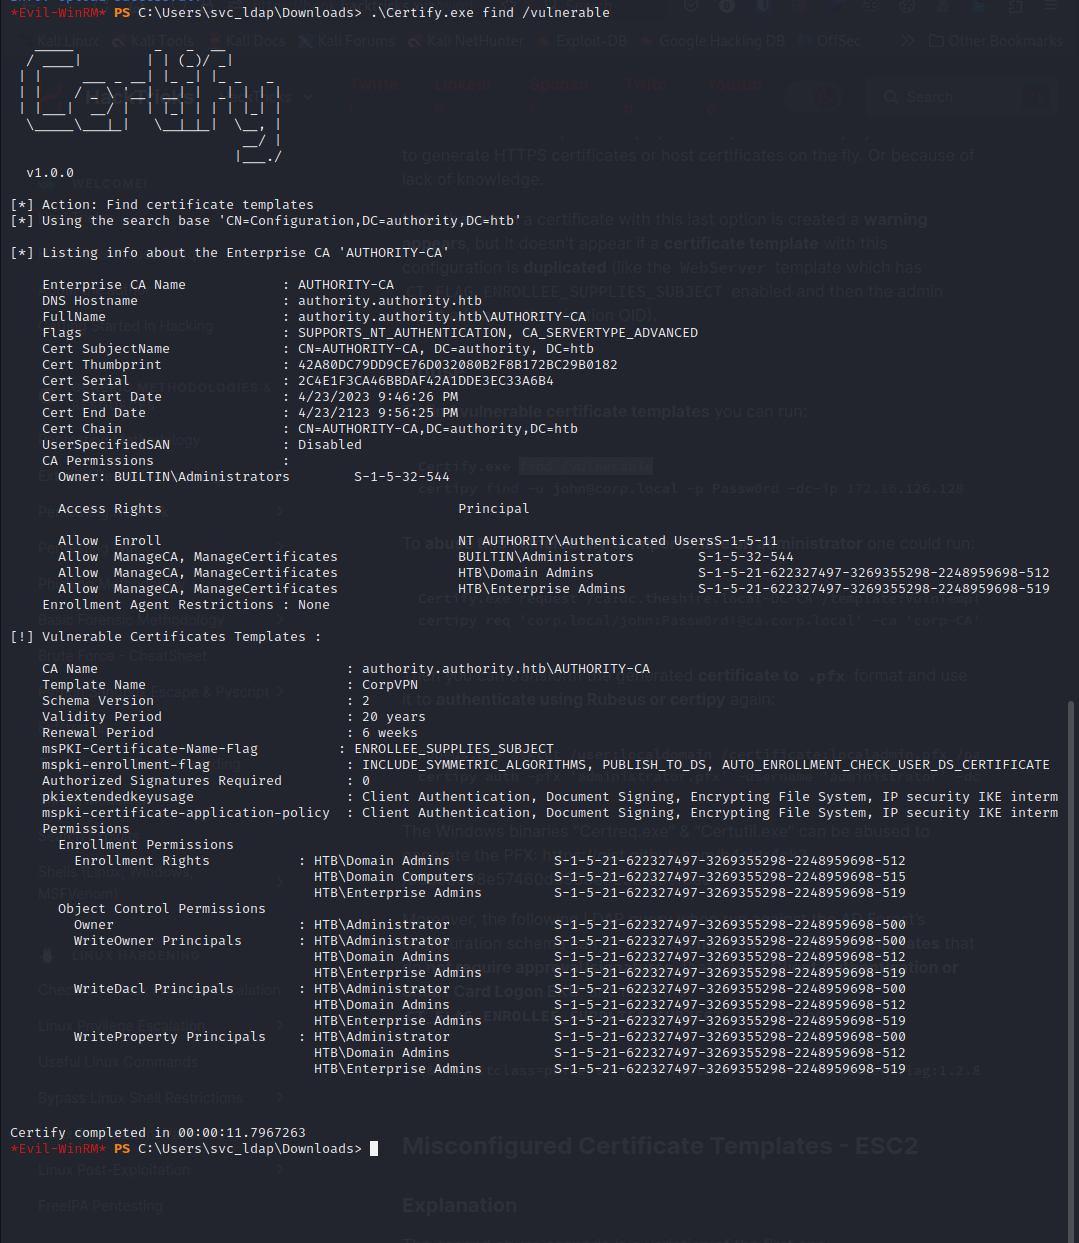
I ran the command specified by Hacktricks to see the vulnerabilities:
Note that to upload
Certify.exewhen we have ourevil-winrmsession you just have to use the commandupload Certify.exe. If you have it in your current directory. You may need to use../if you have it in a previous folder
As we can see on the upper screenshot, we have a vulnerable template called CorpVPN. The inconvenient is that only Domain Admins, Domain Computers and Enterprise Admins can leverage this template. Here, I thought that I was blocked… But looking at our privileges, we can see that we have SeMachineAccountPrivilege:

This means that we can add a computer in the domain with our own credentials.
Note that we can’t do it with the current session because we are not admin neither on the domain nor an enterprise one and we don’t have the computer password.
To add a computer easily, we can use the impacket tool impacket-addcomputer:

Now that we added our computer to the domain, we can ask nicely for the administrator certificate thanks to certipy :):

Note that the specified certificate authority is
AUTHORITY-CA. This is stated in theCertify.execommand above.
For some unknown reason, the
certipycommand failed sometimes even if it has a correct syntax so don’t mind running it several times
Now, we have the certificate in the pfx format, so I thought that I would have to do as in the Timelapse HTB machine but this didn’t work since we don’t have the password of the certificate.
After a bit of digging, I found the tool passthecert.py that could do like a PTH (Pass The Hash) but with certificates. As specified at the top of the README file, I need to use certipy to extract the certificate and the RSA Private Key:

As we already added our own computer, I jumped this part of the README file and went directly to the Change a password of a user part and tried to change the Administrator password:

Root.txt
We have successfully changed the Administrator password and can now connect to the machine with it and… Voilà, we have the root.txt flag:
